
A hydrid approach to woorkworking – Part 4
The addition of Japanese style saws to my tool collection marked a turning point in my approach to woodworking. After I became comfortable with the dovetail saw, I added a ryoba saw (double sided saw) and then a cut off saw (kugihiki) and finally a kataba saw for hardwoods. It was like eating a potato chips, you can never have just one. Each saw was designed for a specific type of cut and each one did it quite well. I found myself reaching for those saws more and more frequently. If I failed to mention it earlier, these Japanese saws are sharp. They hold an edge beautifully. I think it is due to the way the teeth are shaped and sharpened. I have had the original dovetail saw for over 25 years and it is as good today as when it first came home from the store.
Now, as I mentioned during one of the early parts, I never saw my father sharpen his tools. So that was one one critical skill that I lacked. I had chisels and some hand planes, but they were barely usable. After a bit of research, I purchased a three stone system. It had three stones mounted to a wooden block. It was awful. It wobbled, the stones were narrow and the oil made a mess everywhere. Needless to say, it soon was gathering dust in a dark corner of the shop. I was no further along in learning how to sharpen.
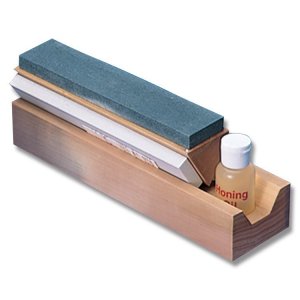
When inexpensive waterstones appeared on the market, I gave them a try. I purchased a pair of Norton combination stones and set about learning how to sharpen my chisels. The results were amazing. The learning curve was relatively short, and soon, I had the mirror finish on the edges that I had read about. Like so many other woodworkers, I proudly wore the shaved patch on my arm from testing the chisel sharpness. Oh yes, I had arrived in the sharp chisel club. I was so encouraged by the results, that I added a really nice set of Robert Sorby chisels to my collection. Other specialty chisels would follow over the years: butt chisels, skew chisels, crank neck chisels, mortising chisels….you get the picture.
Sharpening plane irons soon followed. I was able to put a respectable edge on the plane iron. I soon came to realize that the planes I had were, for the most part, barely adequate. My collection consisted of a modern Stanly #4, a Buck Brother #5 and a standard angle Stanley block plane. I still heavily relied on my jointer and thickness planer for preparing stock for glue up and joinery. With time, I began to add other planes: shoulder planes, low angle block planes, rabbet planes, chisel planes, edge forming planes. The collection grew and grew. I could keep that sharp and ready for use.
Over the years, I have tried other sharpening methods. Scary Sharp utilized various grits of sandpaper on a flat piece of plate glass. The results were ok, but I found myself going back to the waterstones. A few years ago, I purchased a Worksharp 3000. It did a very nice job keeping my chisels and plane irons sharp. Today, it is my go to method for day to day sharpening. A few seconds at each grit and the blade is ready to go. For severely damaged edges, I find that the waterstones are the best method for re-establishing a good edge. Sharpening is a critical skill for any woodworker. It took time, but today, I think I have got a reasonable skill level at sharpening and maintaining my edged tools..
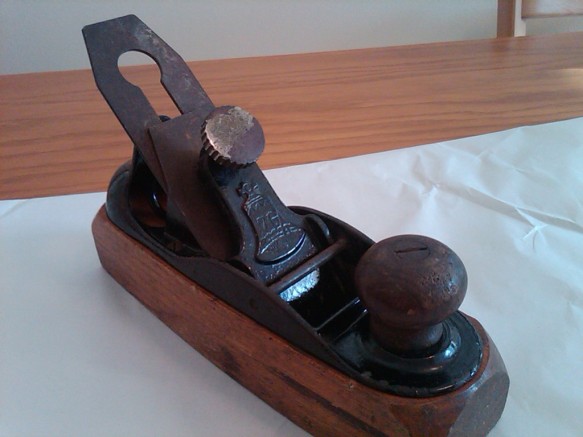
One day, a chance find in a thrift store set my tool collecting in an entirely new direction. While looking through the dusty shelves, I found an odd looking plane. It had a wooden body and a metal top frame. The lever cap had the impression of the Liberty Bell. It turned out to be a Stanley 122 Liberty Bell transitional plane. At $5, how could I pass this oddity by?
to be continued…..
